...
Capture Screens
GetPixit is an a user-friendly tool that allows capturing high-quality screenshots with various options such as Region Capture, Full-Screen Capture, Continuous Region Capture, Window Capture, etc. Description and usage of all the features are explained in this document. Captured The captured image can be edited as required through the editor and can be shared.
...
Screenshots can also be captured with shortcuts using hotkeys. Shortcuts can be changed in user preferences. Application The application tries to set shortcuts based on the availability at the time of installation. If there are shortcut conflicts, conflicting shortcuts are removed.
...
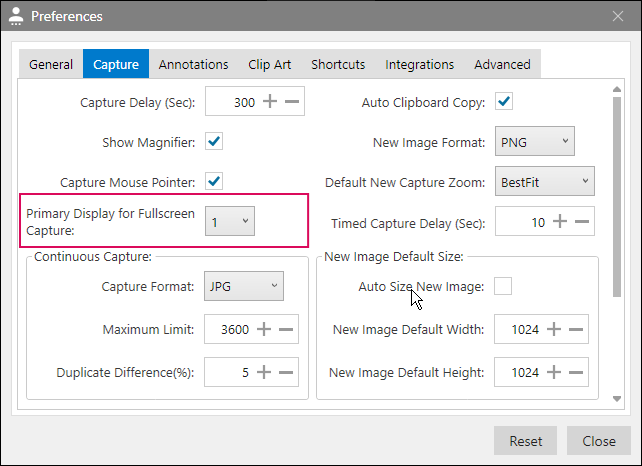
Capture preferences help to set capture delay , and enable/disable showing magnifier and mouse pointer. If 'Auto Clipboard Copy' is enabled, the captured image is automatically copied to Clipboard. All screenshots captured using the region capture are maintained in PNG image format.
Once the region is selected, the screenshot in that region is captured and created as a new tab. Application The application tries to obtain the window tittletitle, and website urlURL, etc. as applicable depending on where the screenshot is taken.
...
This operates the same as Region Capture and the only difference is that captured image is copied to Clipboard. GetPixit does not store the captured screenshot. This is helpful for transient captures which are not required to be managed and can be discarded after a single use.
Last Region
Recently The recently captured region will be remembered and it can be used to recapture as a New image with this option.
...
GetPixit has integrated OCR technology that helps to extract text from images, video, documents, etc. Extracted text can be copied to clipboard using Copy Text. If the text in the screenshot is small, try to zoom - in for better text extraction.
...
Example Region Text Capture
Full Screen
Captures a full screenshot of the primary display. Captured The captured image is displayed in a new Tab. There are various options for fullscreen capture. Fullscreen capture has support for multiple monitors. Submenu item options are shown below:
...
- Displays: The dimensions of connected displays are presented here. Any display can be selected to have a full screenshot of the display.
- Primary with Taskbar: Fullscreen along with task bar taskbar of the primary display will be captured.
Full screen with the taskbar
- Primary without Taskbar: Fullscreen without task bar taskbar of the primary display will be captured.
...
In general, primary display is the display 1 in the Windows display settings. However, depending on the requirement, this can be changed in the User Preferences and a different display can be set as primary.
- All Displays with TaskbarTaskbar: If there are multiple monitors connected, all display screens along with the task bars taskbars will be captured. Note that if the monitors have different resolutions, resulting capture may contain empty space in a low-resolution monitor screen section.
...
Displays with Taskbar
- All Displays without TaskbarTaskbar: When connected to a monitor, both the screens without Taskbar will be captured.
...
- File ->New Capture -> Active Window displays a menu of all the active windows that can be captured. Any of the active windows can be selected for capturing.
- Active Window Icon in Home bar displays Grid view of all the active application thumbnails. Any of them can be clicked to capture as shown in below.
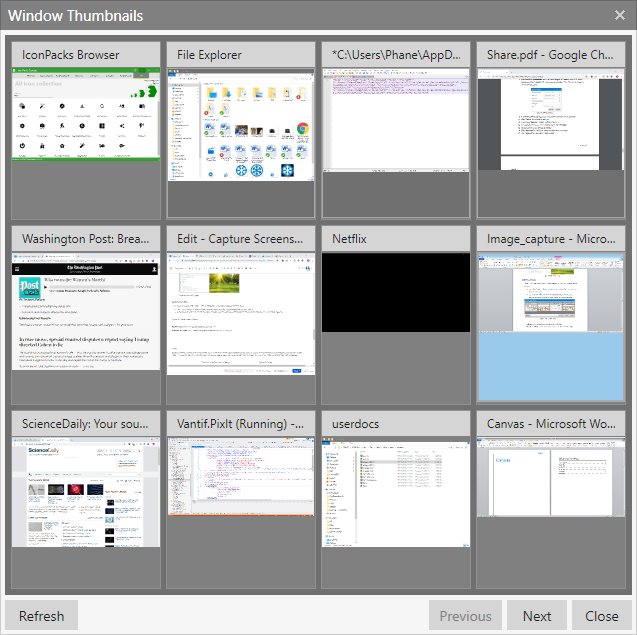
Active Window Capture Thumbnails
...
Timed Capture:
Captures a region of the window after a time delay (e.g. 10 seconds). Timed Capture feature will be useful to capture drop-down menus of an application or dynamically changing content that needs interaction. The default time delay can be changed in User Preferences as show shown below. Timer The timer will start and run, shown below, after which option to capture the screen will appear.
...
Continuous Region captures a fixed region of the screen continuously at user-specified time intervals and automatically names all the images with time stamps. This helps to capture frames of a video presentationspresentation. Duplicate captures can be discarded. By selecting File -> New Capture -> Continuous Region, the application shows Continuous Capture Window for providing various parameters as shown below:
...
Configuring the images with Category, Subcategory and Tags help in retrieving the images quickly during the search. Description added to the image will be helpful during Export. Description of the image along with the name , will be exported with the image. Application The application also has a self-timer feature that ensures capture at specified intervals. While capture is in progress, the counter appears at right side bottom as shown below:
...
Window
This feature allows the user to take a screenshot of a sub-window or inner windows of a page or even the entire page with a single click. Mouse hover shows the window panels with the dimensions to select and capture. With a click, the region will be captured. In the following, see an example for selecting a sub-window in Microsoft Word application.
...
Captures a web page in its entirety. Web Url is downloaded and processed. It is converted to produce a high-quality full page image. Enter a web page URL in the field or select an existing URL saved to Capture. Complex web pages with more images take initial time to load properly. In such cases, the 'Delay' attribute can be adjusted appropriately to capture the fully loaded web page.
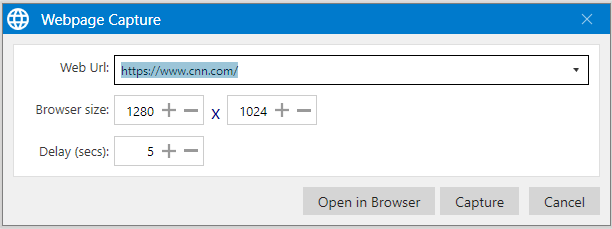
Captured full-length image is opened in a tab. In addition, the web page can also be opened in a browser and can be captured. This is helpful , when there are a a large number of dynamic elements in the page that needs scrolling to render properly before capturing. With this approach, the web page is captured to the best accuracy.
...
- Choose a Web page or window or application for Scrolling Window capture and have it as a recent window.
- Select File -> New Capture -> Scrolling window
- Click inside the window/web page to start the scrolling capture.
...
First, select the image that needs to be captured and click on Start camera. Live The live video feed is displayed in the display area. When the image is stable, click on the Capture image button to capture the image.
...
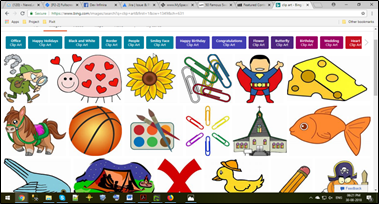
In addition to capturing screenshots from the displays, the application enables creating new screens and adding content to the screen. This is often helpful to create presentation slides, composing multiple image segments into one image using external Clipart and Images, and also to create quick wire frames for wireframes for concept illustrations and user interface designs. These created screens can be projected as slideshow similar to powerpoint presentation slideshow. This significantly reduces the overhead of copying screenshots into powerpoint slides for presentations while managing all screenshots in one place. Updates to annotations can be done right away without switching tools.
A new screen can be created from File→New Image or using  button in the top toolbar. If the command is executed from File→ New, the application opens a Window for setting width, height, background color of the screen image to be created.
...
When the new image is created directly from the top toolbar, the application does not show the dialog box for adjusting width and height. It will create the image right away without prompts. This helps with the quick creation of new screen images for drawing.
...